Adding Individual Recruits
You can add recruits individually to the system: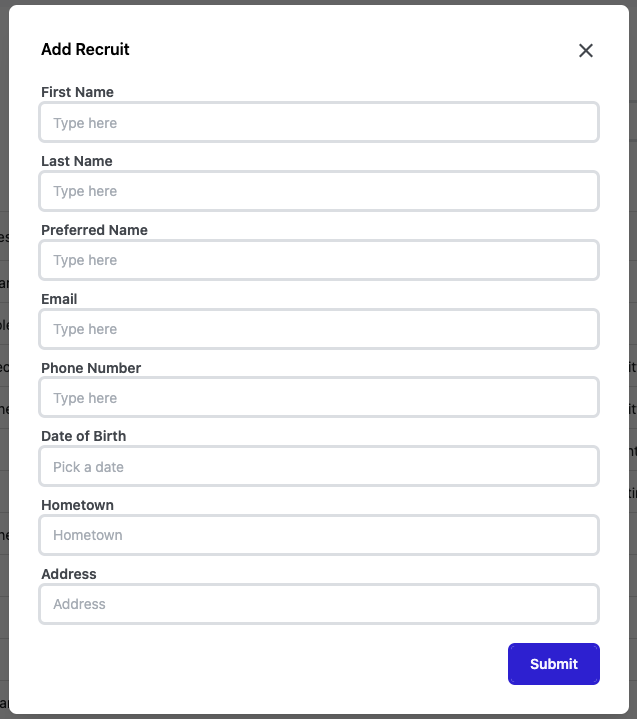
- Navigate to the Recruiting Section: In your WinWon account, go to Recruiting > Recruits.
- Add a New Recruit: Click "Add Recruit" and fill in the recruit's essential details.
- Save: Click "Submit" to complete and add the recruit to your database.
- Customize Information: Add any additional information as needed. Click to learn more about Building and Customizing a Recruit Profile.
Bulk Uploading Recruits
To add multiple recruits at once, use the bulk upload feature.
Please refer to Best Practices and Getting Started with WinWon Recruiting for guidelines on bulk uploading.
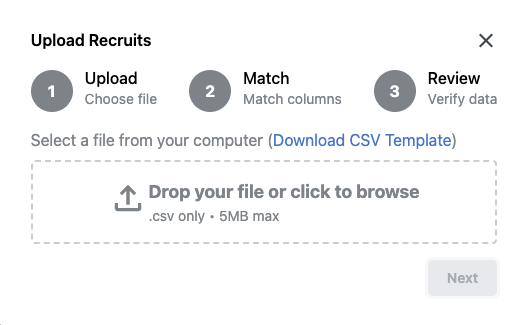 Prepare Data File: Ensure your data file is in a CSV format and is organized to match WinWon’s recommended data structure for a smooth import. If you would like an example, you can download a CSV template file from the "Upload Recruits" section in WinWon.
 Your file should include:
-
- Each column of data in your spreadsheet should have a clear header. This header will match to a corresponding data field in WinWon for upload.
- All data must be in one tab of a CSV sheet. WinWon is not setup to read multiple tabs in one file.
-
- Limit bulk uploads to 1,000 recruits or fewer to maintain manageable recruit pools and cultivate meaningful recruiting relationships.
 Upload File: In the "Recruits" tab, select "Upload Recruits" and follow the prompts to upload your file.
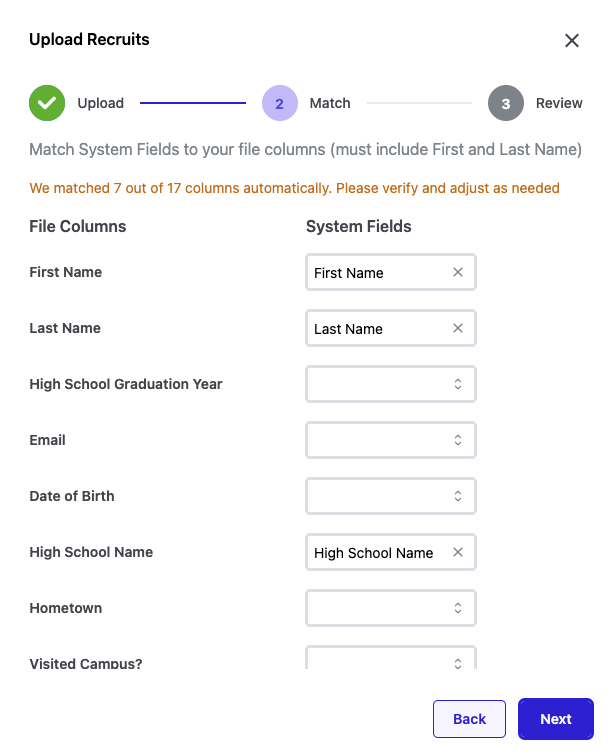
- Map Fields: Map your file’s data fields to the appropriate fields in WinWon to ensure accuracy and consistency. Please note that the mapping function will only pull existing fields in the system. If you need to create a custom field, do so BEFORE you begin your bulk upload so you have a corresponding field to upload data to.
- Finalize and Save: Complete the upload, and WinWon will add all recruits in the file to your database.
⚡Tip: Create a custom view in your recruit table that matches the format of the spreadsheet you are uploading. Arrange the columns in order and ensure you have a data field for every column. Create custom fields as needed. This will help you easily see the data when your upload is complete!
Learn more about Creating and Saving Custom Views .
Unsure how to get your data in the correct CSV format? Check out How to Convert an Excel Spreadsheet to CSV Format for Recruiting Bulk Upload.