Creating and Managing Groups
-
Access Groups: Navigate to Teams>Groups to view existing groups or create new ones.

-
Create a New Group:
-
Click Create New in the upper right corner.
-
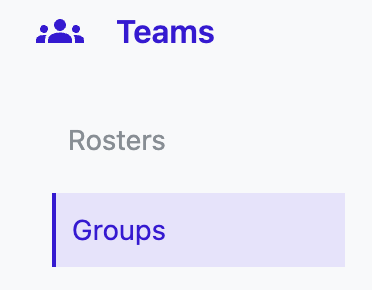
Name your group. The page will display two sections:
- Left: Athletes added to the group.
- Right: All available athletes to pick from.
-
Add an athlete by selecting Add next to their name. Remove an athlete by selecting Remove. Athletes already in the group will no longer appear in the list of available athletes.

-
-
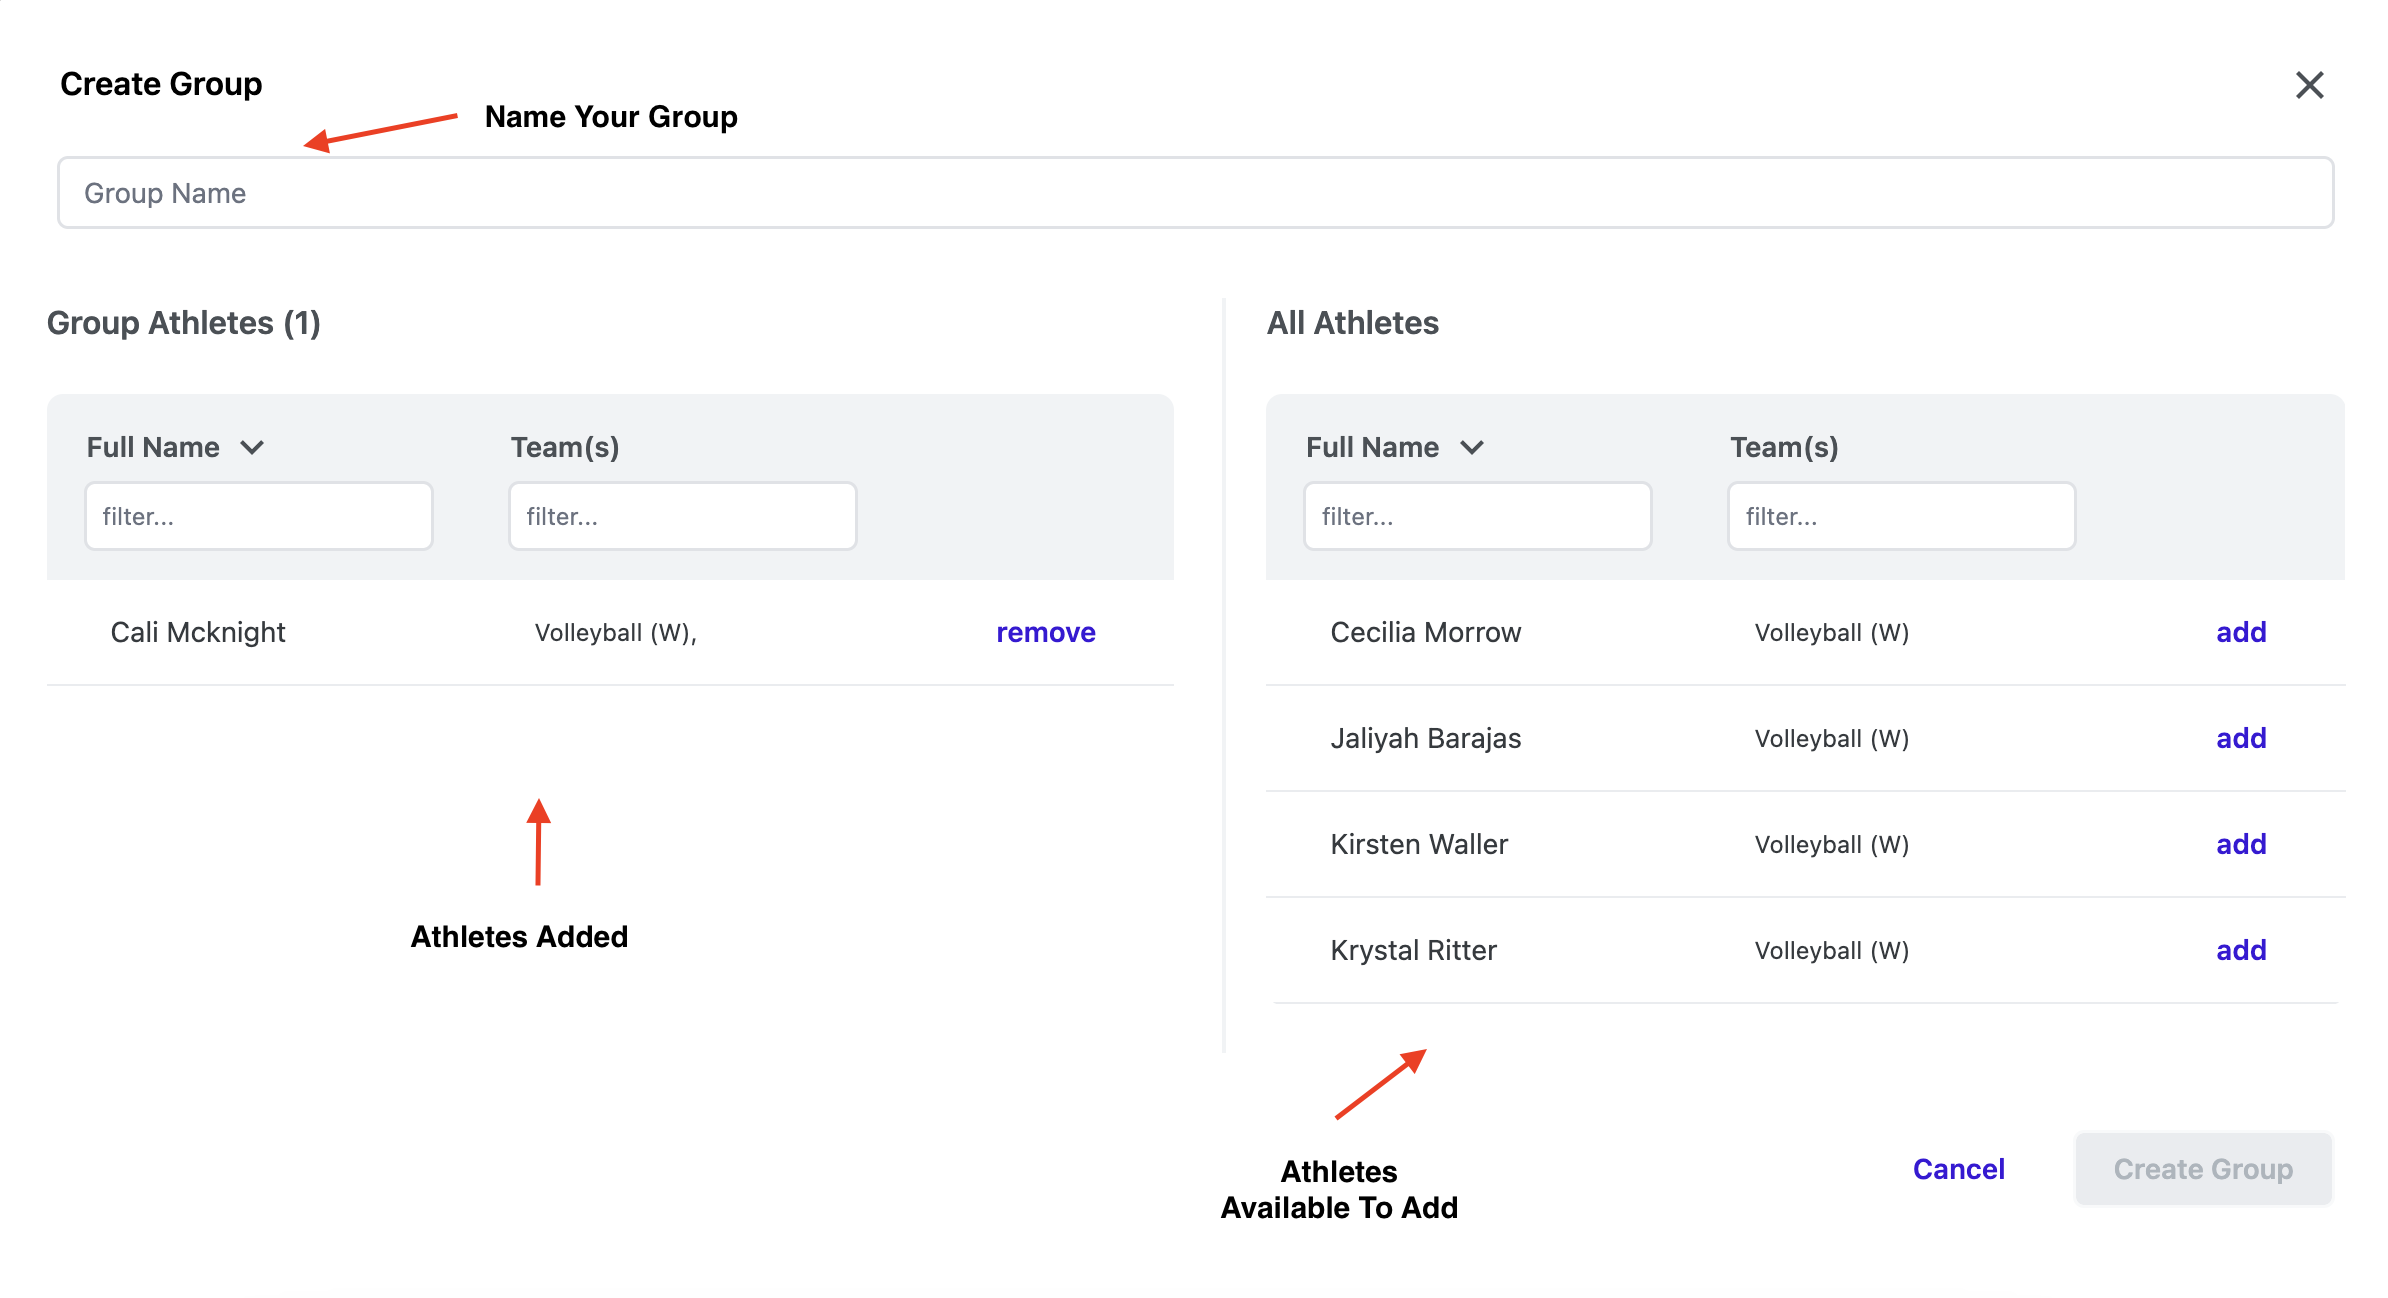
Filter and Search:
- When creating a group, use the Filter bar to locate athletes by name or filter by team if you manage multiple rosters.

- When creating a group, use the Filter bar to locate athletes by name or filter by team if you manage multiple rosters.
-
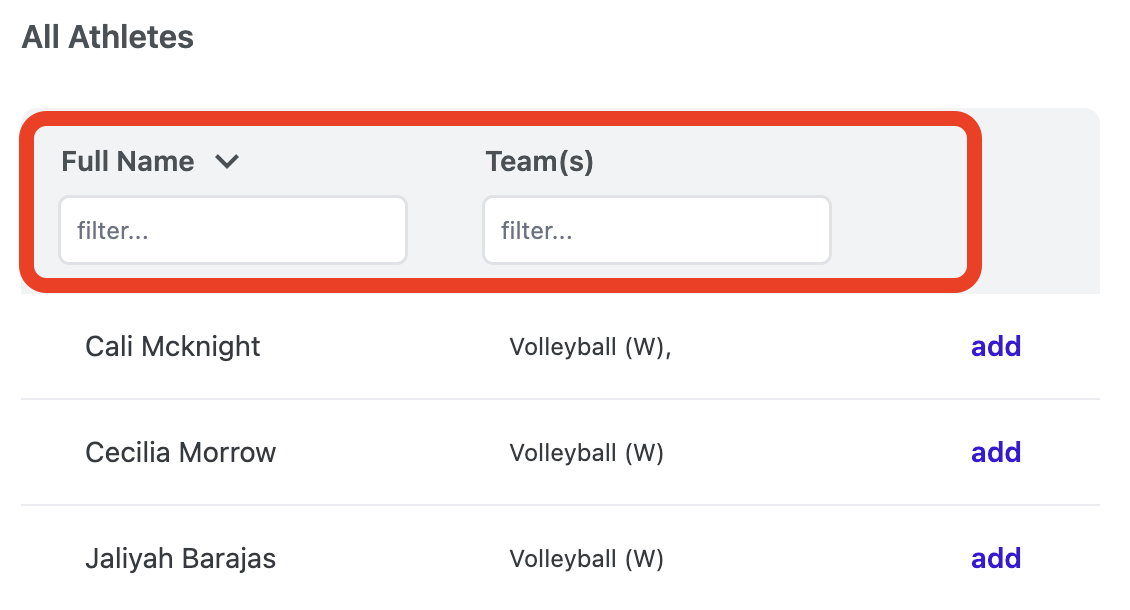
Set Group Visibility:
- Under Who Can See This? choose between:
- Only Me: Keep the group private.
- Team Staff: Share the group with all team staff members and administrators with access to the team, allowing collaborative editing.
- If a group is shared, any viewer of the list can make edits, but only the owner can share, make the group private, or delete it.
- Under Who Can See This? choose between:
-
- Note: Groups with athletes spanning multiple teams can only be private and cannot be shared.

- Note: Groups with athletes spanning multiple teams can only be private and cannot be shared.
5. Group Management:
-
- On the Team Groups list, view details such as the group name, number of athletes in the group, the associated team, and visibility settings.
- Edit an existing group or delete it using the trashcan icon.
Examples of How to Use Groups
- Communication: Send targeted emails or texts to specific groups.
- Event Organization: Invite only selected groups to calendar events and track athlete participation. Learn more about Creating Events and Participation Tracking.
Pro Tip: Create cross-team groups like captains or leadership groups to streamline admin-level activities.